Wednesday, October 27, 2021

A Little Kitchen Makeover

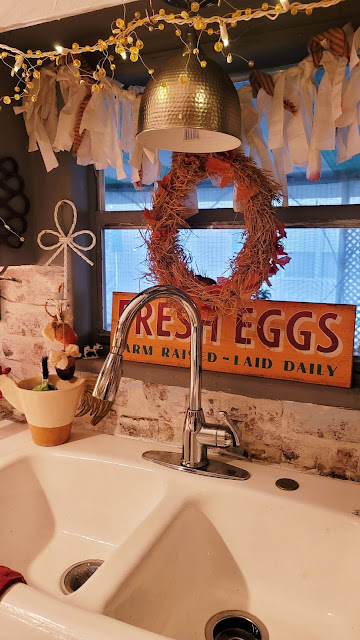
 Welcome! I don't know about you but it was time for a bit of a change in the kitchen. After all I practically live in there, how about you? I had been obsessing over different hues of green but it was great while it lasted. I have found that the Grey's lend a certain calmness  to a room. So I went with a darker shade of grey and painted up the soffit, wall around the window all which were green. The 2 facing walls are licorice black which plays very well with grey. I added a big shelf that could accommodate  big mugs, some greenery, my favorite cow print and some lights for whimsy. Below the shelf is a rolling cart which serves as a coffee/tea/hot chocolate drink center.  I also brought in my huge island a great asset to holiday baking. The open cabinet was also painted and filled with some ironstone. The kitchen window I made a garland added a raffia wreath.


How about you? Changed anything up or have plans to. 

                     Thankyou for stopping on in!

                                 Lisa

Tuesday, October 12, 2021

THE CUTEST LIL CHRISTMAS TREES MADE FROM BROWN PAPER

 Welcome! If you follow along you know how I love to make something from nothing. This craft is totally free. I used an empty soda box and brown paper from a box that I received in the mail today, I don't know if I was more excited about the contents or the brown packing paper. If you live in the south Publix grocery offers brown bags and also Aldis as well.  If you are unable to access those Dollar Tree has rolls of brown paper. Also old book pages would also work. For this craft you will need:

Empty soda box cardboard or cardboard of equivalent  weight

Brown paper

Hot Glue

Duct tape (used to hold the cone shape together)

Optional  paint, ribbon for tree decor


First step is creating a cone shape from the cardboard to the desired size. Use Duct tape to hold the cone shape. Trim the bottom so it sits flush on the table. 
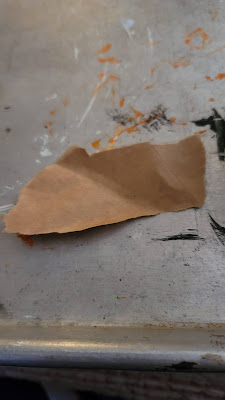
Simply rip your brown paper into small sizes. Then simply one at a time sqish and roll the paper into a ball . The you can begin to Hot Glue the pieces to the cone. Keep going until the cone is completely  covered.

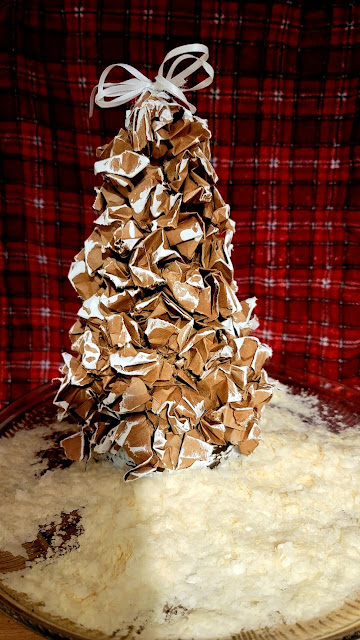
I left a bit bare on the bottom to represent a tree collar. Then I painted the very bottom.


I took a brush with white paint  and lightly brushed. 


This is a very easy craft and a great way to get family around the table, I enjoyed my afternoon crafting. You can add things such as glitter, beads, bows whatever you desire! These trees are definitely gift worthy. 

                                      Happy Crafting!

                                          Lisa

Saturday, October 2, 2021

Witches, local order lodge 305, fun Halloween decor!

 Welcome! It's been fun decorating today! Sure Halloween is not as fun as days gone by. Maybe no trick or treating but that doesn't mean we can't soup up the decor. Nowadays we have to come up with fun times at home and that can be done with fun decorations and foods. 

I decided to do up the fireplace with some witchery! The chippy with is very old about 30 something years. It's chippy paint adds to her potion character. When decorating just have some fun with it. An easy gathering of items and placed with imagination. 

This broom belonged to my mom who has passed , very old but still runs! Wink wink

The candelabra I found at a online estate saleable in good fun!


Thanks for stopping in. Now for my order of witches lodge #305......

                                         Lisa

Monday, September 27, 2021

Cute Halloween Witches made from wood Scraps!

 Welcome,happy you could stop by, I have been making the cutest wooden witch sisters! I had several pieces in a scrap pile along with some paint and cording. 

First I cut off a slant on the the top two sides of the wood,this will be the hat, the only other cut is a thin piece of scrap for each and this will be the brim.

I used green for the face. Black for the hat and body. I loosened up cording for the hair. Easy simple to put it together. And a painted face and a bow. Cute farmhouse country witches.


This project was super fun! And to think just some scrap wood, paint  and imagination !

                     Happy Crafting friends!

                             Lisa

Sunday, September 12, 2021

Cereal Box Farmhouse Pumpkins!

 Welcome! I am so excited to share this fall craft. Mainly because they are made from your empty cereal boxes, which I save each and every one of them.....I have lots of crafts using them . 

The items you will need :

Empty cereal boxes, hot glue or stapler., scraps of fabric, paint, brown paper bag, cording for the little tag. I had some copper wire but it's not needed, just to swirl and hand on the stem. Scissors of course.

This can be a fun craft for the whole family to do. A great way to get everyone around the table.whats more it's basically a free craft.

Let's take a look at the step by step :


First step, cut your cereal box in strips, you don't need to measure just eyeball it. Cut a piece of box out like a circle, this is what you will attach the strips to.
Begin attaching the strips, not to close just as shown until...
You have a full circle as shown. It's your preference if you want the printed side on the outside or inside I did both ways I actually let some peeks of the print show through. And the brown side was also nice letting the brown show to make it looked aged
Now its time to join them all together on the top, I used a stapler, but glue will work fine

Now your pumpkin has taken shape and is ready for..

Paint, any color you wish, mine is a light green with a bit of dark green highlights while the paint was still wet I sprinkled a bit of cake spice for a vintage look and a nice scent.
I
I found that an empty paper bag made a great stem seeing you can twist and shape it well.
I had some wire to add swirled to the stem
I ripped some homespun fabric for bows 
I also made some tags to hang on the stems, saying, spice, farmfresh and harvest.


Whats fun is not everyone will be the same, and depending how long you cut the strips you can make them all different sizes.  I sure hope you have as much fun crafting these pumpkins as I have. And remember to save your empty cereal and food boxes , more crafts will be coming!


                      Thankyou for stopping in,

                              Happy crafting!

                                     Lisa

Tuesday, September 7, 2021

A Fall Fireplace full of Warmth!


 Welcome, as fall swiftly approaches we all start to gather, bake enjoy family. In my living room the fireplace sets the mood for Fall. Whether you have a faux or real either can be decorated for all the seasons. I think it's the true focal point of the room. I snipped some vines from my grapes to create the simple wreath. I chose some Pumpkin colored ticking fabric to craft bows and make the garland pendant.

Just a couple of wooden pumpkins, old books and an old vintage outdoor light turned indoor candle holder. 

The owl/ branch dishes were a country door find many years ago and of course white lights for whimsy.  I also crafted a pendant garland to hang with the lights. The candle holder was a goodwill f find that I white washed.  Just a simple fall fun fireplace!


Hope you will be enjoying your Fall season too!                                               Lisa 


Black & White Gingham...A Farmhouse Favorite

  Welcome! Hoping you are enjoying the warm days of summer. I am so enjoying the many prints of the peel n stick wallpapers. I've been p...