Tuesday, May 30, 2017

Decorate your walkway with some fun flower pots made from what other than "Cans" for about 5$

Hi there happy you could stop in today!  If you have been visiting here you would know that I always say to save those big cans that perhaps fruit or tomato sauce come in . I have done several "can crafts",  This is some links to other fun can projects:    http://mrsblackstone.blogspot.com/2016/08/you-may-want-to-save-your-cans.html     http://mrsblackstone.blogspot.com/2014/01/an-empty-tomato-sauce-can-and-some.html                     http://mrsblackstone.blogspot.com/2014/01/come-see-what-i-made-from-399-flowers.html      Today I am going to share my walkway post planters otherwise known as Painted and decorated huge cans.

 First things first......I was going for the old copper look So I used some bus golden yellow.....once that was dried I dry brushed some deep cranberry color.... once dried I patted on some watery greenish blue to get this effect.
 Important ......If you are hanging these to a wood surface You will need to take a rather pointy screw driver and a hammer and make a hole. The best way to do this is by using a piece of board such as this.


Also important drainage holes or your plants roots will rot away. Make enough so the water can drain easily.
 And here you have it so the can was free, paint I had on hand ribbon also on hand so I used one bag of garden soil that was on sale at Walmart for about 2$ and the plants were at Home Depot for about a 1$ each so.........................for about 5 $ I have brightened up the walkway!


 Seeing as there were 3 posts I decided to number them..


The best part about this craft is you can decorate these however you like !


 A just for fun photo The screen porch door has a lacey curtain on it
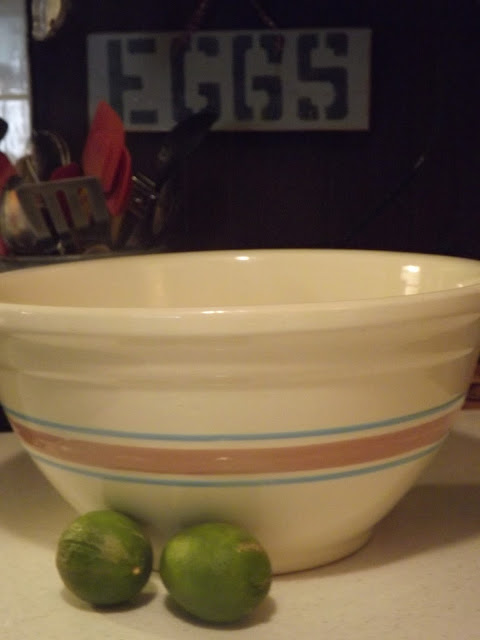
I also wanted to share this Goodwill find from Saturday, I believe it is Yellow Ware it has a 14 stamped on it and also oven ware stamped on it. and it is super heavy, I am loving it!

So save your cans so you can easily craft some fun projects for practically nothing!                                             

                                                   Until Next time ....Happy Crafting!


Come party with me where I share my crafts!         http://www.funkyjunkinteriors.net/2017/07/diy-salvaged-junk-projects-385.html    

                                                              Lisa

Monday, May 22, 2017

Northen Girl is making delicious southern style sweet tea with a twist!

Hi Yall, I should say today. The Northern girl I am just cant get used to that word but I will admit it is welcoming! Its a greeting that says welcome , sit for a spell , would you like a cold tea ? Today I want to share how I do Sweet Tea !

Whether you are a Green tea drinker or a black tea drinker it does not matter. Tea can be so flexible so to speak and you can flavor tea as you like. Green Tea has a numerous amount of health benefits as apposed to black tea.
 So the first step is I take a regular pan and fill it with cold water I would say its a quart pan I use now here is the trick we don't want this water to boil so you have to shut it down before....... Once the water is just about to boil shut it off remove from the heat and throw your teabags on in I use 6 depending if you like it light or dark.So while that's going on lets take a trip to the front garden......Flowers are really starting to take off due to the rainy season starting.......
 Impatience  big big big!    Now what we are looking for it mint, wonderful mint.
 Here it is next to the Pentas, green and ready for picking cause we are going to need this for out sweet tea!
 Mint can really take the garden over so you have to tame it by keeping it well picked.
So we are going to use my Pestle and Mortar  today ...you take a good chunk of lemon with a good amount of skin and a sprig of Mint don't take the leaves apart and there is a reason for that , you don't want little pieces of leaves in there. About 1/2 cup of sugar to the lemon and mint and just gently work  the ingredients so to speak. If you don't have one you can use the underside of a spoon perhaps.


The reason for this is that all 3 flavors will be brought to life when the mint leaves are worked and the lemon peel along with the sugar the small is delightful!


 Once you have it good and married go ahead and add to your pitcher. Now put your  cooled tea on in the pitcher and add more sugar while its still warm or room temp. Once  the sugar is dissolved add your ice. Get your glasses ready and enjoy!

Tea spoons are much longer than a regular spoon so they reach past the size of the glass.

 Today Ill share with some friends that have stopped on by to chat a bit.


We made some red velvet cupcakes for out afternoon tea ....fabulously yummy!
Sweet tea may seem complicated but  once you make it a couple of times it will become easy. This recipe may not be for everyone  but give it a try you just might make it your favorite choice of teas!
 
Thank so much for stopping by !
Lisa

Wednesday, May 17, 2017

A BIT OF RED, WHITE & BLUE TO BRING IN THE SUMMER HOLIDAYS!

Hi there, welcome! Spring showed up for about a week and I think we hit summer already......humid, rainy tropical weather. Its been in the high 90's, hate it!! That's when AC comes into play and plenty of popcorn and movies as well as crafting. Unless I am gardening, grass cutting or swimming I'm inside.

I do love the summer celebrations that include picnics, fireworks and family fun. When I decorate with my bits of red, white and blue some old and some new it seems to make the house happy. So have a comfy seat and a sweet tea and Ill show you around......


I had most of all you see except for this wonderful huge white and red stripped pillowcase I found at Goodwill. I actually soaked it in Tea water to get the white to look tan and a bit aged, for .50 it was a good find. I used regular brown grocery bags to make a star garland for the fire place. I also crafted a couple of little signs from some leftover wood.


 I used  an old star to trace and then cut them out and gave a swipe of red paint.


 This is a small sign that I crafted , had everything ....paint, star and material.
 I just added some star beads and a couple lil things such as this little star ragdoll who found a comfy seat in a tea cup.


 I used half of the material for this shelf , along with some other things I had on hand.
 Just love to shop the house for red dishes and this canning jar filled with faux cherries. Cherries are always a summer sign to me.
 I used the other half of the material on the wreath , I used some festive white lights and hung the star garland over them.


 I used the white platters that I recently found on a thrifting journey, I had bought the 2 candle holders also at a thriftstore they were different colors so I painted them a rich red so they would match.
 An old metal  pitcher along side a couple of vintage red goblets that were moms.
 The star was purchased at an antique store it is small but very heavy, love the look and can't imagine the history to it.


A coffee table vignette , a metal tray with a star I painted that I bought off the 75% Christmas isle right after the holiday, I always buy lights and star items because you can use them anytime. I made some decorative balls with some red, white and blue material strips that sit in a blue and cream color pottery bowl.
 
Remember all I explained the we were raising the roof , I will be sharing that soon once it is completed.
 
So with a little imagination and some old and some crafted items we are ready for the summer holidays!
 
Thanks so much for stopping on in!
Lisa


Come join me where I share my crafts!          http://www.savvysouthernstyle.net/2017/06/wow-us-wednesda (Savvy Southern Style)


Thursday, May 11, 2017

THRIFTING, CRAFTED SIGN & WE ARE RAISING THE ROOF!!!

Welcome !  How are you enjoying the Spring and all it has to offer? So much to do but I have to admit Gardening is my favorite! Love to walk in the garden and pick fresh salad pickins.....a taste like no other. I have mentioned before that my very kind neighbor has a humongous Mango tree that bears enough fruit for all. We discovered Mango smoothies last season and they are to die for......super yummy!

It had been raining a few days ago so I decided to craft a new sign. With some paint and stencils I brought a tired piece of wood to life.


Stencils or free hand ....Signs are a great way to express any kind of décor.


I found this delightful basket just sitting on the shelf waiting for me to take it home....its very old ,It has signs of wear on the hinges and wicker. At first I thought it was a mini picnic basket but when I opened it up I saw it was a pie basket.
I can just imagine the scrumptious pies that sat on this removable little shelf. Pies to church suppers, family picnics etc... a good ole basket with a delicious past!

He was also sitting on the shelf waiting just for me lol......Hes a little carved rooster, so very cute..the rooster lover in me could not pass this up.

Only one of this but it was so beautiful , an Eastern China with 20k gold designing.

These two mini platters with beading were so pretty and only .99 each could not pass them up either.

Also found this beautiful French tablecloth, love it with its pretty design and light blue hues.


Also this wooden candle holder that I will paint ...I already have one similar so I will be painting them both to match and I will share that later.


Things are really growing well in the patio garden picked some wonderful radishes......
Here is the mini rose bush with a rose bloom
And here is the ripe lettuce that will join the salad tonight with some evoo and spices.
 
planted some herbs yesterday , thought I would try them in a pot this time. Actually I will put some in the garden as well, I am curious to see which will grow better.


So this is a huge playhouse that my son built for his daughter when they were living here so I thought since it was not going to be used for that I will do some renovating such as raising the roof and cutting a new doorway it can be my Potting shed!   I am a small person at 4ft 11in so this will be perfect for me so I will be working on that today and fri. I cant wait to share when I am done so do come back and see!

 
A very cool way to give white tile is just some decorative paper, this was a pretty drawer liner so I cut them to size and added them here and there. It packs a great decorative punch and you can change it out when ever you like I just used some painters tape jelly rolled in all 4 corners.
 
 
So happy you stopped on in today,
Lisa

Why Not Give Your Holiday Tree Some Easter Love!

 Welcome, thankyou for stopping on in today! Easter is swiftly approaching as I have been busy planning decorating and meal plans.  I have a...