Wednesday, December 16, 2015

AN ILLUMINATED WHIMISCAL DINNER TABLE

Welcome....... tonight I have made a little dinner to get everyone  to the table. A large pot of homemade broccoli , cheddar ham chowder and baked sea salt /olive oil crusted potatoes. Since I have decided to put two oblong tables together this means that one side sits flush against the wall so I could take advantage of seating 9 comfortably and being able to use some extension cords at the end for decorating a bit. So the first thing was to take some white lights and spread them down the center...I pressed a sheer curtain panel and softly placed it on the white lights down the center.


On top of the lights I put some iced branches with some red icicles and of course some pine cones with a tin watering can filled with fresh greens and a humungess candy cane. I used the snowman dishes and matching bowls. 


I simply cut some red mats from a roll of brown paper on one side and red on the other.


Simple clear glasses filled with a plaid napkin, candy cane and snowflake.

And also a few Christmas mice scattered around the table which was a big hit for the littlest girl at the table.


The dining room chandelier has a dimmer so I kept the lights at a minimum.


A vintage snowman is lit at the end of the table to complete the icy , snowy setting.


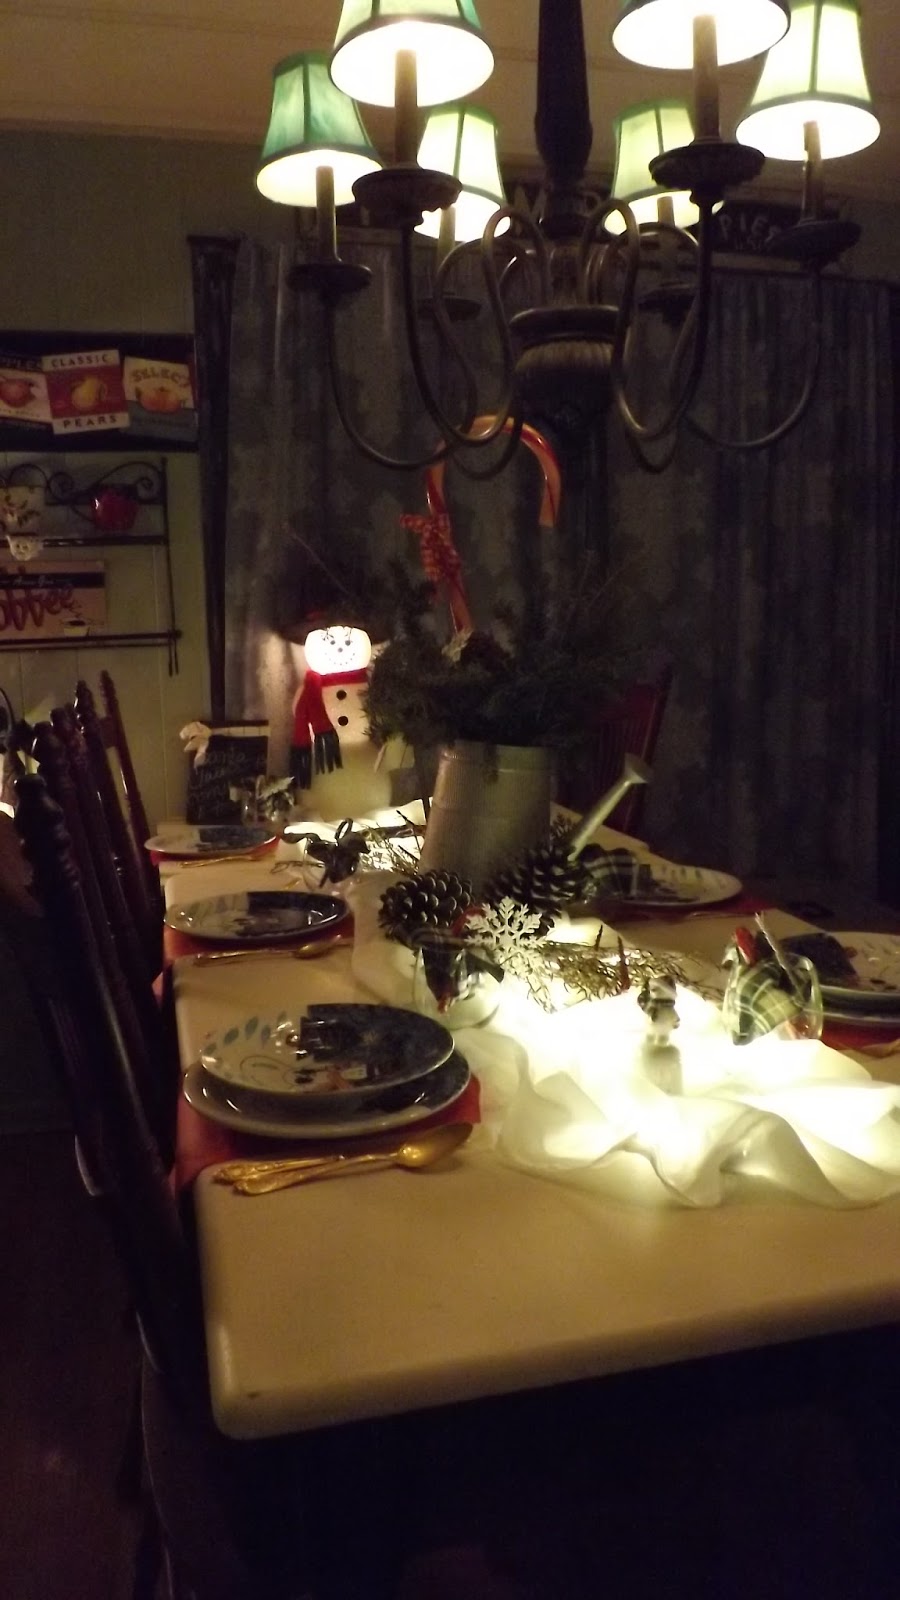
Table settings can be so fun .....just pull together all your resources and see what you can conjure  up!
Have some fun with it....
Happy decorating until next time
Lisa


Tuesday, December 8, 2015

MEET ME AT THE SCREEN DOOR..............

Hi there busy bees, I'm just guessing I'm not the only one keeping late hours these days? Ive been caught sitting at my sewing machine in the wee hours!  Today I would like to share a pretty wreath that I have crafted so meet me at the screen door.......


Ok ..I shared the post a while ago how I crafted this vintage style screen door and today it is setting the scene for a Christmas wreath . I used some amaryllis flowers, glittered snowflakes and some white branches.


I gave the grapevine wreath a lick of white paint


An old shovel I placed at the bottom of the screen door. So happy I could share this today. Happy Crafting this Holiday season!
Lisa

Sunday, December 6, 2015

WHO EVER SAID THERE IS NO SNOW OR ICE IN SW FLORIDA?

Hi there........welcome. If you see this blog title you must be wondering .....This year I decided to get a bit creative with what I had on hand, Meaning I just didn't want to hang lights and call it a day. So with 6 boxes and a roll of extra duty foil , things I had on hand and a bit of illumination I came up with this.

 
Just three different sized boxes some paint and scraps of material is all you need I did stick them together with some construction glue.

 
My kids were laughing when I was crafting these snowmen making comments about snowmen are not square, of course my reply was "they are now".

 
Earmuffs , a scarf complete my new men! I scattered Styrofoam balls about and hung some flakes with cording.

 
A reindeer keeps them company


I had made the sled from wood last year


I filled a basket with fresh greens that were free at Lowes, it is the leftover scraps from the fresh cut trees.

 
Happy to say after everything was put together the kids no longer laughed at my snowmen....I did throw in that Santa is watching so you better agree..lol


There is my son tweeking the lights as usual.
 

Thursday, December 3, 2015

OLD PICTURE FRAME INTO A DEER PIECE OF ART

Hi there, so thrilled to share my craft with you. If you are like me you have several picture frames stashed away. Am I right? well this is one way to utilize them.
 
The frame is a golden color so I thought I would give it a bit of wax .


So I scanned the net to find just the right shaped silhouette, I used some leftover black burlap.

I securely stapled a piece of black and white flannel to the back of the frame.

There he is I glued the burlap to the flannel and also added some bling to circle his neck. Jut knotted pieces of coordinating ribbon.

I wished that I had made his silhouette just a tad larger. I think that this would make a nice gift as well. Hope you try this out and have fun with it!
 
Happy crafting....Lisa
 

Tuesday, December 1, 2015

TREAT YOUR DINNER GUESTS TO SOME FUN!

Hi there and welcome......  Last year I started this really fun way to show my guests that I do appreciate having them. I simply taped a piece of masking tape to the bottom of the dinner dishes ....and as everyone was enjoying their dinner I made the announce that everyone  should look underneath their plate and check for tape. Cause whomever has the tape on their plate is the WINNER!  In my case I crafted this.....


I used the black and white checked flannel and added some burlap

 
I stuffed it up with some polyester stuffing


Added a bow and button for some prettiness!  The winner was delighted to go home with her new pillow and needless to say they can't wait to return for some more holiday dinners. This is a fun way to show your family and friends some holiday fun. So get crafting and have some fun!
 
Bye for now
Lisa


Why Not Give Your Holiday Tree Some Easter Love!

 Welcome, thankyou for stopping on in today! Easter is swiftly approaching as I have been busy planning decorating and meal plans.  I have a...